Your first run
This page takes one real story through the whole pipeline. It is the same story the project uses as a CLI baseline, so the output below is what the tool actually produces.
Walkthrough video (to be recorded)
A short screen recording is planned for this page. It should show, in one take and with no cuts:
- Launch the UI with
bash launch_ui.sh. - Press Check My LLM and show the green report.
- Paste the story below into Requirements.
- Build the living test plan, review it, and sign it off.
- Press Run Intelligent Pipeline.
- Open Run & Fix, run the suite, and show the result line.
- Open Evidence & Reports and show one per-step screenshot.
The recording will be embedded here. Until then this note is the specification for it, not a broken link.
The story
Paste this into the Requirements box (or into the CLI's "Enter User Story"):
As a customer, I want to browse products on the website and add them to my cart so that I can purchase them later.

1. Navigate to the automationexercise.com home page
2. Click the Products link in the header navigation to go to the products page
3. On the products page, click the Add to cart button for Blue Top
4. Verify a confirmation message appears indicating the product was added to cart
5. Click the Cart link in the header navigation to go to the cart page
6. Verify the cart page displays the product that was added with its name and price
Set the target URL to https://automationexercise.com when the UI asks for it.
What happens
- Plan. TanCat analyses the story and builds a living test plan - one row per acceptance criterion. Review it and sign it off.
- Generate. The LLM writes one pytest function per criterion, with a placeholder where each locator belongs.
- Scrape. TanCat opens the page and captures the real DOM.
- Resolve. Each placeholder is scored against the scraped elements and replaced with the best selector.
- Write. The finished test file is saved under
generated_tests/test_<timestamp>_<slug>/.
The generated test
Resolution produces a plain pytest file. This is criterion 4, exactly as written for the story above:
@pytest.mark.evidence(condition_ref="TC-04", story_ref="S01")
def test_04_verify_confirmation_message(page: Page, evidence_tracker):
    evidence_tracker.navigate("https://automationexercise.com/")
    evidence_tracker.click('a[href="/products"]', label="Products", expected_page="https://automationexercise.com/")
    evidence_tracker.click(
        '.add-to-cart.btn[data-product-id="1"]',
        label="Add to cart",
        expected_page="https://automationexercise.com/products",
    )
    evidence_tracker.assert_visible(
        "#cartModal", label="product added to cart", expected_page="https://automationexercise.com/products"
    )
The selectors - a[href="/products"], .add-to-cart.btn[data-product-id="1"],
#cartModal - came from the live page, not from the model.
Run it
In the UI, open Run & Fix and run the current suite. In the CLI, choose Run Generated Tests. The summary line has this shape:
The counts and time depend on the story and the site; the format is the point. Each passing test also writes an evidence sidecar - see Evidence and reports.
Learned answers follow the project
The UI and the interactive CLI share one set of learned locators per
project, so a second run of the same project resolves faster. The
interactive CLI reads the project you named in the UI automatically; for any
other command, set
AITEST_WORKSPACE=<project> AITEST_RAG_SCOPE=<project> - see
Install.
The CLI
bash launch_cli.sh opens the same pipeline as a menu, and tancat run runs it
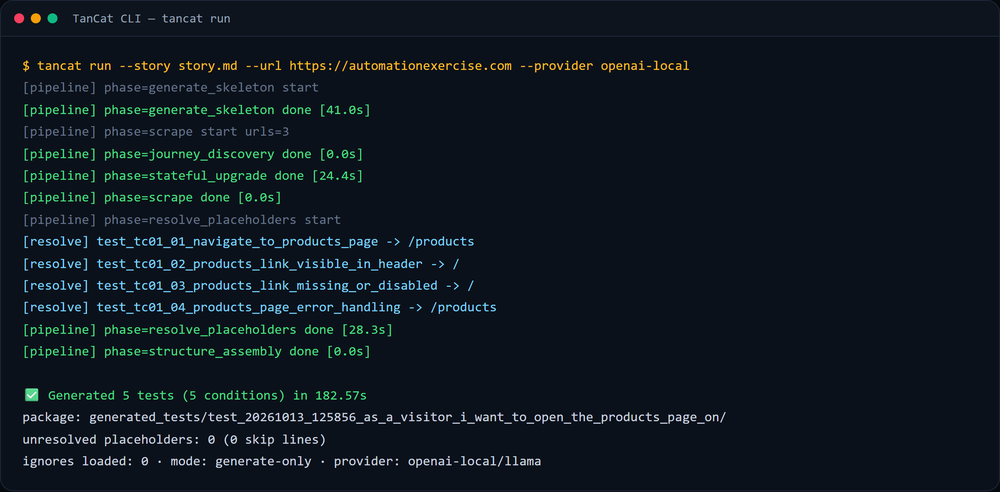
headlessly for scripts and CI. A real tancat run against a short story: